Do you suffer from leg discomfort, tingling, or numbness? Sciatica is a condition that starts in the lower back and goes down through the buttocks to cause pain in the back of your leg or your entire leg. The pain can be unbearable and at times the discomfort caused can be irritating.
It commonly occurs, when the sciatic nerve is pressed due to herniated disk, bone spur, or narrowing of the spine. This results in inflammation, pain, and numbness in the affected leg.
Sciatica can be managed with the help of Ayurvedic treatment, as this treatment aims to give results with no side effects and ensures fabulous results.
Ayurveda and Sciatica
According to Ayurvedic terminology, Sciatica is referred to as ‘Gridhrasi’ where Gridhra means eagle. The gait of the affected person resembles the eagle’s walk. Also, the inflamed nerve seems to be like an eagle’s beak. As the basis of Ayurveda depends on the energies which are formed with the combination of five elements present in the air, Sciatica is caused due to imbalance in Vata Dosha. Ayurvedic treatment for Sciatica focuses to restore the equilibrium in the body of the unbalanced Dosha.
According to Ayurveda, there are two types of Gridhrasi:
- Vataj Gridhrasi – The pain is present along with severe stiffness and the presence of pulsations in the back region.
- Vata Kaphaja Gridhrasi –Here, you can feel that your leg freezes for a few seconds. Along with this, you may also experience drowsiness, indigestion, constipation, fatigue, and symptoms of Vataj Gridhrasi.
The person who has sciatica has various symptoms like:
- The shooting pain travels from the lower back to buttocks to thighs and finally down the back of either leg.
- Numbness in the lower back, buttock, leg, or feet.
- Loss of movement.
- Needles pricking like feeling in legs, toes, or feet.
- Painful tingling.
- It can be in the form of a leg cramp with stabbing or electric-like pain.
- Unable to control the bladder or bowel movement.
The situation may worsen after laughing, coughing, or sneezing, while holding your breath, with a sudden movement, or staying still in one posture, or at night. Sciatica usually affects only one side of the body at a time, but it may also occur on both sides of the body depending upon the affected nerve.
Yoga poses to cure Sciatica pain
This blog shares the Yoga benefits along with the techniques on how to perform the asanas which may help you a lot in lessening your pain. So, don’t just read them for the sake of your knowledge, also make sure you practice these poses!
Balasana
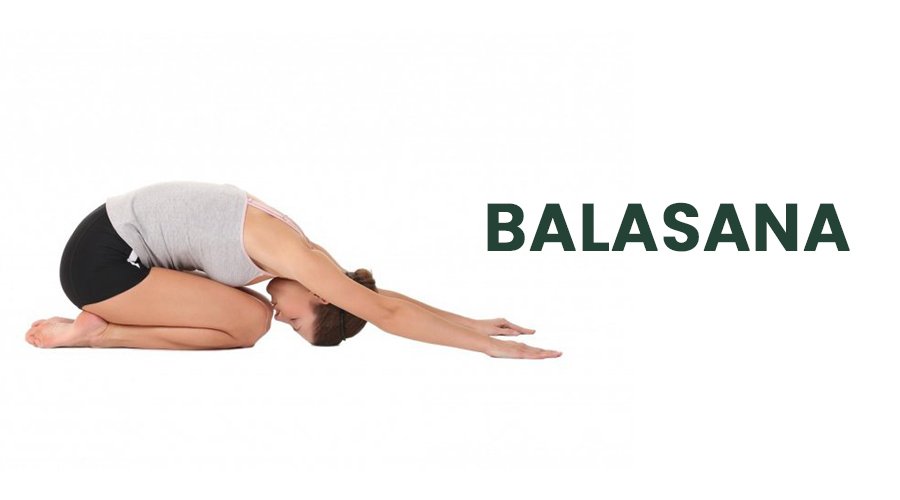
Steps:
- First of all, sit on your knees so that your heels touch your buttocks. The knees can be kept together or apart. Keep your hands on the thighs.
- Now bend forward slowly so that your head gently touches the ground and your chest is in between your knees.
- Your hands should be stretched in front of you with palms facing the ground.
- Regulate your breath and hold this position for 2-3 minutes. Relax and deepen your breathing.
- Make sure while returning to the original sitting position, you are slow and soft.
- Repeat this 5-10 times.
Benefits:
- This asana relaxes the body, lengthens, and stretches the spine.
- It also gives flexibility in the hip, thighs, and lower back region.
Adho mukha svanasana
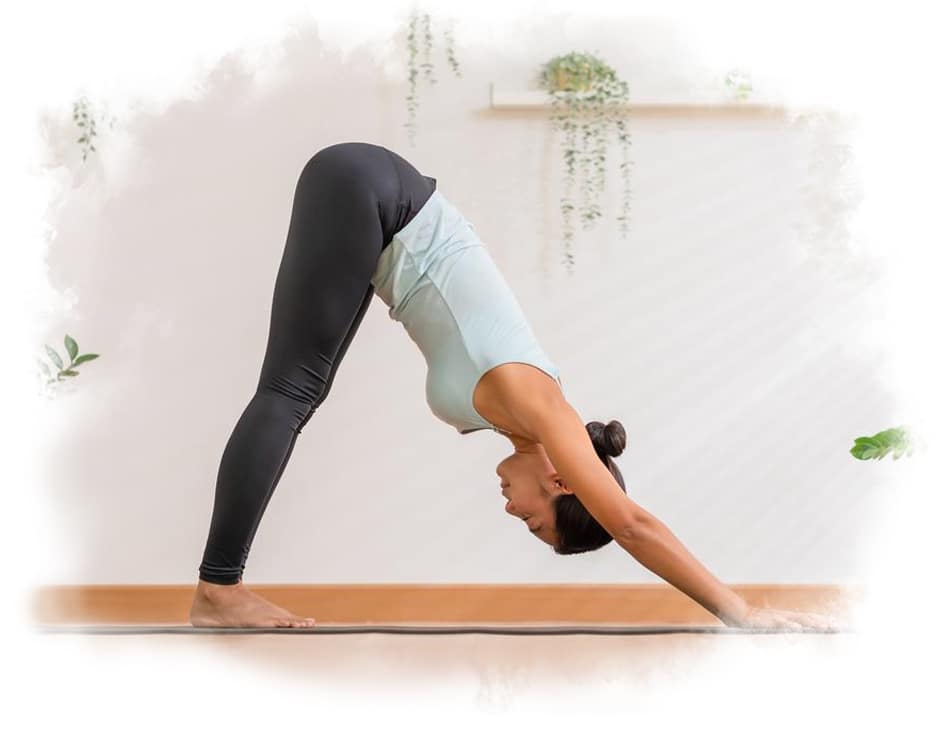
Steps:
- Start this with the first step you did in Balasana.
- Bring your hands on the front and start lifting your hips towards the ceiling.
- Now, drop your head down with ears lined up along your upper arms and chin towards the chest.
- Make sure the knees are tilted just a little as it is the right stretching pose.
- Now, rock back and forth on the feet and hands slowly.
- Hold this pose for 1 minute and gently lower yourself into the original position.
Benefits:
- This asana aligns the posture of the body.
- It also relieves one from pain and stiffness.
Ardha Chandrasana

Steps:
- Begin with keeping your right foot in front, bend the knee and stretch your left foot backward.
- Shift all the weight on the right foot.
- Put your right hand on the ground in front of the right leg and your left hand on the hip/thigh region.
- Now lift your left leg so that it becomes parallel to the ground, keeping your left hand on your hip.
- Now slowly lift your left hand in the upper direction widening the palm maintaining the balance.
- For further stretching, move your head and look in the forward direction, and after that look in the upward direction.
- Stay in this pose for around 1 minute, and then gently come back to the starting position.
- Switch sides and repeat this pose.
Benefits:
- This phase provides stability and balance to the body.
- The flexibility which is provided in this asana strengthens and stretches the spine, glutes, and thighs.
- It relieves the tension present in the nerves and muscles.
Bhujangasana
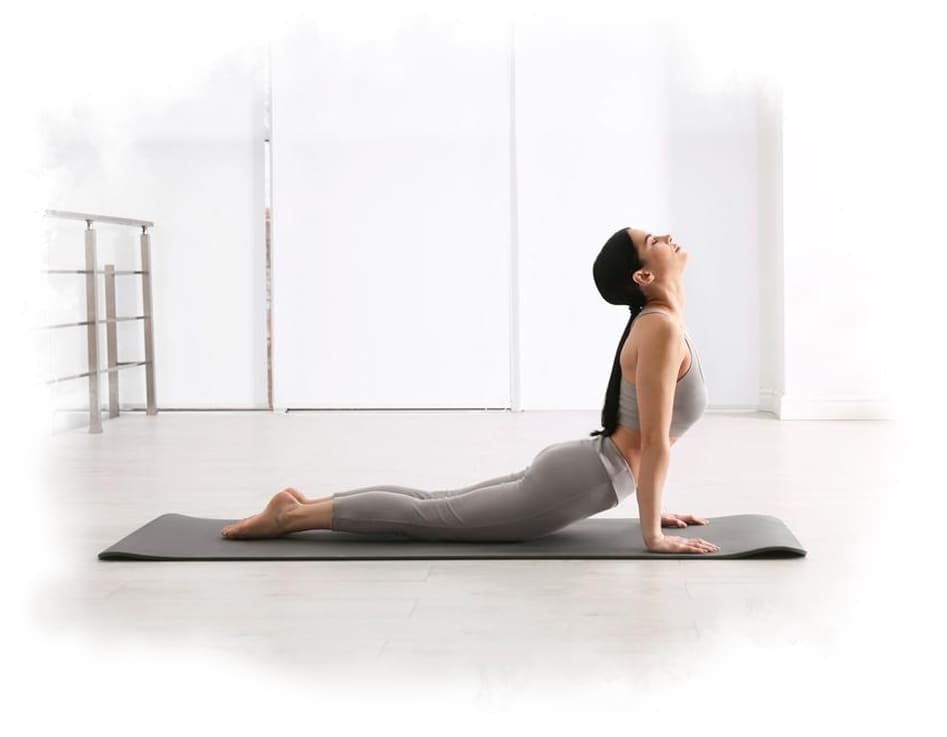
Steps:
- Lie on your stomach, with your legs straight, and bend your arms in such a position where your hands are directly under your shoulders.
- Tuck your elbows close to the chest and keep your hands in a comfortable position at the level of the bottom of your rib cage.
- Now, while inhaling, lift your head, chest, and shoulder off the ground in a gradual way.
- Maintain the bend in the elbows with just your upper portion lifted while the lower portion of the body should be placed on the ground.
- Continue this stretch for 30 seconds and practice deep breathing.
- Make sure you gently return to the original position.
- Repeat as per your comfort but do not do it more than 4-5 times.
Benefits:
- This asana stretches the spine and strengthens it.
- It also promotes circulation in the body as it increases the flexibility of the body.
Salabhasana
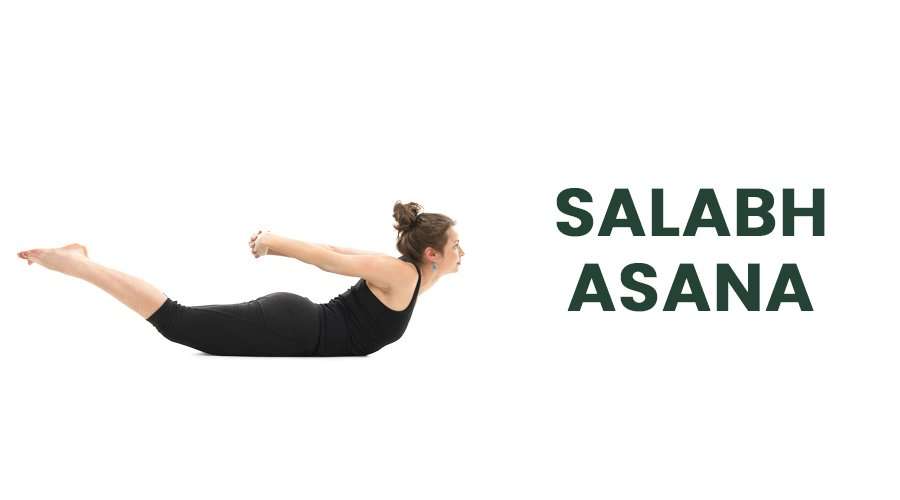
Steps:
- Lie on your stomach keeping your arms on the side.
- Keep your hands beneath your thighs.
- Now, lift your one leg or both legs, whatever you are comfortable with.
- Just be sure the stomach, lower back, and buttocks are flexed.
- Hold in this position for 30 seconds.
- Release your body, return to the starting position.
- While performing this, take deep breaths.
- Initially, you just can lift the lower portion of the body, but with practice and time, you can also lift your chest and head region.
- After returning to the starting position, rest, relax, and then again repeat it 1-2 times.
Benefits:
- It stretches the back and core muscles aiding in spinal mobility.
- By regular practicing of this asana, core and gluteus are toned, and also the pain is reduced.
Pawanmuktasana
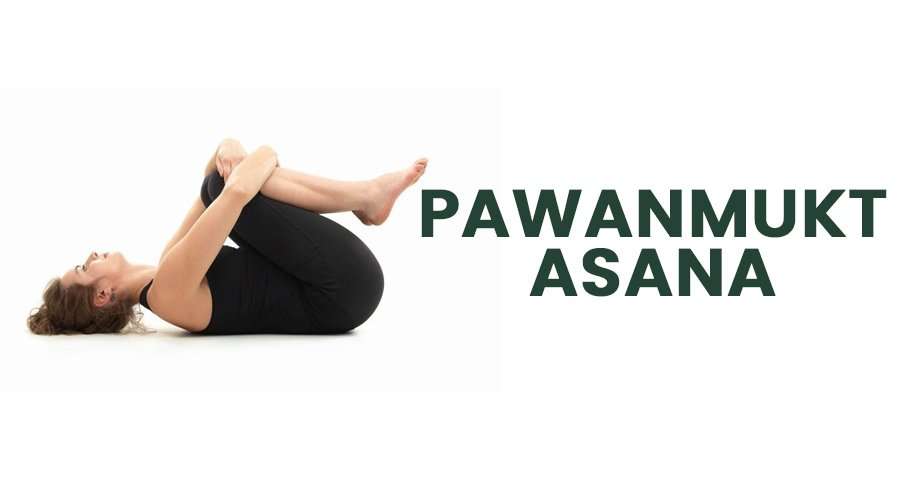
Steps:
- Firstly lie on your back, and pull your knees towards your chest.
- The knees and ankles should be pressed together against each other.
- Now wrap your hands around the knees, interlacing your fingers.
- Now, to make the stretch more effective, lift your head in a forward direction so your chin touches the chest.
- Stay in this position for around 1 minute. Relax and repeat it 2-3 times.
Benefits:
- Along with strengthening abdominal muscles, it reduces belly fat.
- It massages the intestines and other abdominal organs providing relief.
- It eases the tension in the lower back strengthening it.
- Also, the blood circulation in hip joints is enhanced by this pose.
Setu Bandha Sarvangasana
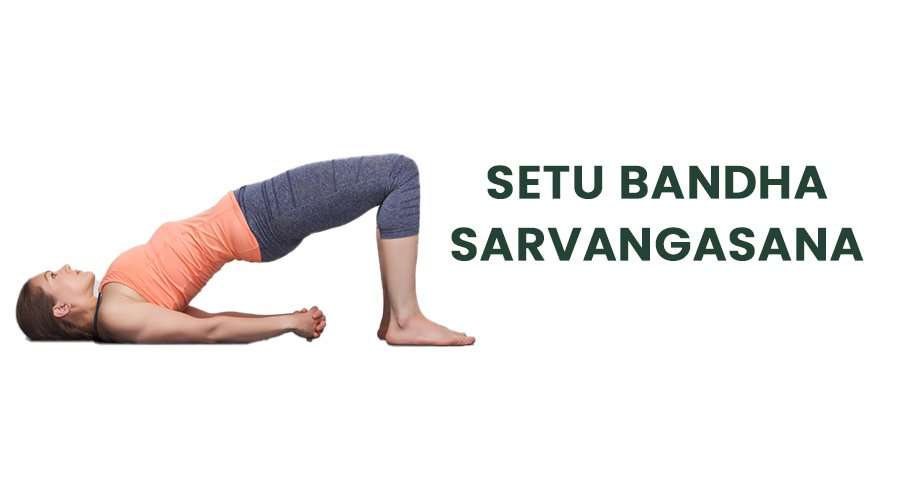
Steps:
- Lie on your back, bending your knees and your heels should be placed towards your hips.
- Put your arms on both sides of your body with palms facing the ground.
- Now, slowly lift your back and spinal region from the floor raising your buttocks.
- To maintain the alignment of the body, you may use a block or towel.
- Stay in this pose for about 30 seconds-1 minute and then slowly lower down your body and come back to the original position.
- Repeat this 5-6 times.
Benefits:
- It stretches the chest, neck, spine, and hip region.
- It strengthens the back and buttocks.
- It reduces fatigue by rejuvenating tired legs.
- It also reduces backache.
Yoga enhances the way of living. Moreover, not only it provides relief to the affected area but it also calms the mind, and soul. Since, stress is the major cause of all the issues; Yoga controls it by providing soothing effect to the body. So, lie down on your Yoga mat and perform the asanas!
Despite all the efforts, to ensure your well-being and to prevent yourself from the problem, additional treatments and guidance is necessary. Self-management would no doubt give you results but the experts are going to assess the problem thoroughly and provide you with appropriate treatment. So, for effective results contact us!